Open Files With A PWA

Modern Web Weekly #24
PWAs are back on iOS 17.4! 🎉
After a couple of turbulent weeks, filled with uncertainty about the future of PWAs, Apple decided to restore the installation of PWAs as standalone apps in the final version of iOS 17.4
Although this was quite a relief for many developers worldwide, it seems the battle has just begun. Although PWAs can be installed again on iOS, this currently only works for Webkit browsers which is any browser on iOS. When real third-party browsers can be installed, there will still be no API available to enable non-Webkit browsers to install PWAs (which was the initial reason for Apple to disable PWAs). This effectively brings us back to square one: PWAs can only be installed through Webkit which means that many features are still not supported.
In the meantime, the grace period in which gatekeepers have time to comply with the DMA has expired so regulators are now expected to enforce it. What this will bring is still uncertain, but according to the Open Web Advocacy (OWA) this is a clear violation of the DMA. You can read a breakdown of the relevant sections in this article.
The point here is that in their statement, Apple claims that PWAs had to be disabled because there’s no security integration for non-Webkit browsers to enforce isolated storage and display permission prompts when, for example, a web app wants to access the camera.
I wonder if that also means non-Webkit browsers won’t have access to any of these capabilities. I would say non-Webkit browsers are just native apps on iOS so they should have access to all the capabilities other native apps have (access to camera, contacts, sensors, push notifications, etc.)
But if that's not the case for PWAs, I guess it’s not in place for web apps running in these browsers either, which is a situation the EU clearly will not accept.
To be continued...
Coming soon to a browser near you
Shortcuts on MacOS
In the midst of all the Apple-PWA controversy, Safari 17.4 was released bringing a lot of improvements and new features.
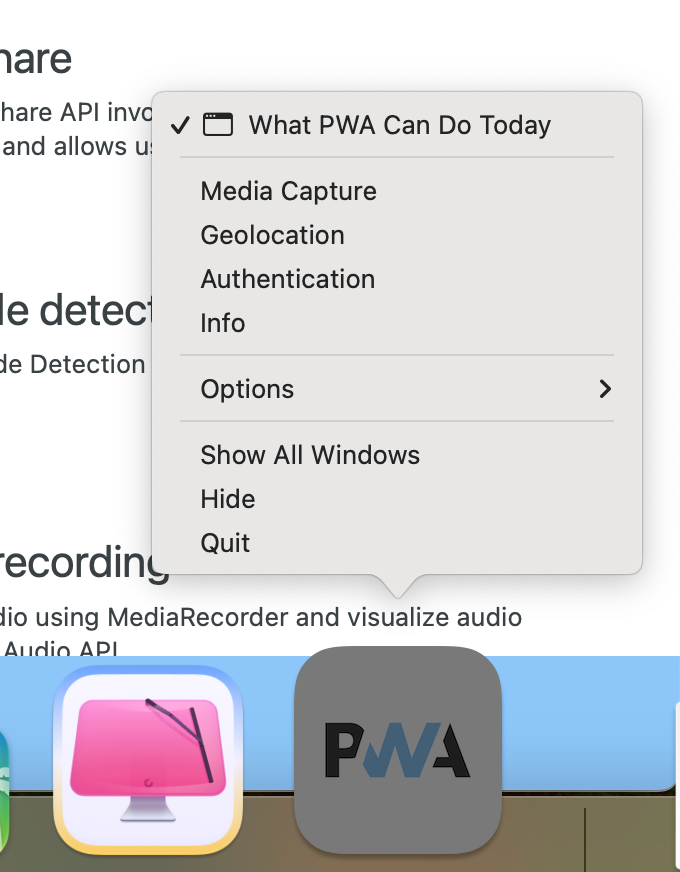
The most important feature in my opinion is that web apps added to the MacOS Dock now support shortcuts through the shortcuts member of the manifest.json file. These shortcuts provide quick access to features of the PWA and are available in the File menu and the Dock context menu that can be opened by right-clicking the icon.
shortcuts": [
  {
    "name": "New Kitten",
    "url": "/new-kitten"
  },
  {
    "name": "Discover",
    "url": "/discover"
  }
]
shortcuts in manifest.json
Shortcuts are added to manifest.json and consist of a name and a url. When the shortcut is clicked, the page located at the url will be opened. PWAs installed through Chrome already supported this and in both cases, the shortcuts are only available when the app is running, not when the app is not running unfortunately.
Declarative Shadow DOM in Firefox
Firefox 125 now ships with support for Declarative Shadow DOM which means this feature now has cross-browser support! 🎉
Register your PWA as a file handler
In Chrome and Edge, you can now register your PWA as a file handler with the operating system which means you can choose your PWA as the app to open certain files with. You typically do this by right-clicking a file, clicking "Open with..." and then selecting your PWA.
On Windows and ChromeOS you can also set a PWA as the default app to open a file with, so when you double-click a file of that type, it will be opened with that PWA.
This feature is desktop only and is supported on MacOS, Windows, and ChromeOS.
To register your PWA as a file handler you first need to specify which files it can handle:
"file_handlers": [
  {
    "action": "/file-handling",
    "accept": {
      "image/pgn": [".png"],
      "image/jpeg": [".jpg", ".jpeg"],
      "image/webp": [".webp"]
    },
    "launch_type": "single-client"
  }
]
The file_handlers member holds an array of objects with the following properties:
action: a URL within the scope of the PWA that will be navigated to when a file is opened with the PWAaccept: an array of MIME types and extensions for the files the PWA can handlelaunch_type: determines if a single client will be launched for all selected files (single-client) or a new one for each selected file (multiple-clients)
The file(s) that a user selects will be available in window.launchQueue and by setting a consumer for the file(s) through the launchQueue.setConsumer(), the files can be handled.
The consumer is set by passing a callback function to setConsumer that receives a launchParams object whose files property contains the selected files as an array of fileHandle objects:
launchQueue.setConsumer(async (launchParams) => {
  if(launchParams.files.length) {

    for(const fileHandle of launchParams.files) {
      const file = await fileHandle.getFile();
      const url = URL.createObjectURL(file);
      const img = document.createElement('img');
      img.src = url;

      // do something with the <img>
    }
  }
});
And that's it! Your PWA can now open files on desktop.
I added a demo with a code sample to What PWA Can Do Today and below are the screen recordings from MacOS, Windows, and ChromeOS:
File Handling API demo on MacOS
File Handling API demo on Windows
File Handling API demo on ChromeOS
Anchor Positioning with pseudo-elements
I recently saw some really cool demos that make smart use of Anchor Positioning combined with pseudo-elements.
In case you missed it, I wrote about Anchor Positioning in Modern Web Weekly #2.
Anchor Positioning enables you to connect elements together, for example, a dropdown menu and makes sure the anchored element always stays inside the viewport. You do this by specifying a DOM element as the anchor that the anchored element will be connected to.
It turns out, you can also use pseudo-elements as anchors and this opens interesting possibilities. I found a nice demo by Luke Warlow that uses the thumb of a slider (<input type="range">) as the anchor and anchors a popover to it that contains the value of the slider.
The thumb of a slider is represented by the ::-webkit-slider-thumb pseudo-element and with the anchor-name CSS property, you can anchor some element to it.
::-webkit-slider-thumb {
  anchor-name: --my-anchor;
}

[popover] {
  anchor-default: --my-anchor;
}
Here's a codepen that slightly modifies Luke's demo (you may need to open the browser version of this email to view it):
Slider tooltip with Anchor Positioning
Scoped CSS for Web Components without Shadow DOM
While encapsulation is the main selling point of Shadow DOM, it's also one of the biggest pain points for some developers. This is often an issue if you want to share styles among Web Components since Shadow DOM closes Web Components for CSS defined outside of them, except for inheritable properties like color and font-family for example.
There are solutions like CSS Custom Properties, ::part, and constructable stylesheets but these can become cumbersome and may not always be the right solution.
With the @scope at-rule you can now also add scoped styles to a Web Component without using Shadow DOM. The benefit of this is that all styles outside of the component are also available inside of it, while you can still define CSS that only applies to your component.
Let's define a button with some CSS that gives it a red background and white text:
button {
  border: none;
  background-color: #ff0000;
  color: #ffffff;
  padding: 8px;
  font-size: 1rem;
}
It will look like this:

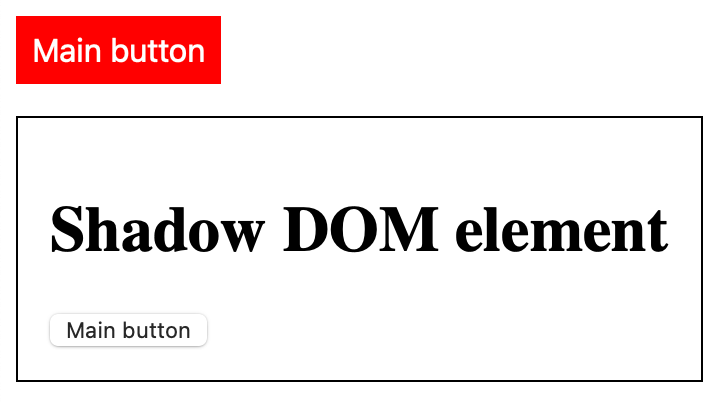
Now let's define a Web Component with Shadow DOM that also has a button inside it and put it in the same HTML document:
class ShadowDOMElement extends HTMLElement {
  constructor() {
    super();

    this.attachShadow({mode: 'open'}).innerHTML = `
      <style>
        :host {
          display: block;
          margin-top: 1rem;
          border: 1px solid #000000;
          width: fit-content;
          padding: 1rem;
        }

      </style>
      <h1>Shadow DOM element</h1>
      <button type="button">Main button</button>
    `;
  }
}

customElements.define('shadow-dom-element', ShadowDOMElement);
Since this component has Shadow DOM, the CSS we defined for the button outside of it will not apply to the button that's inside of it:
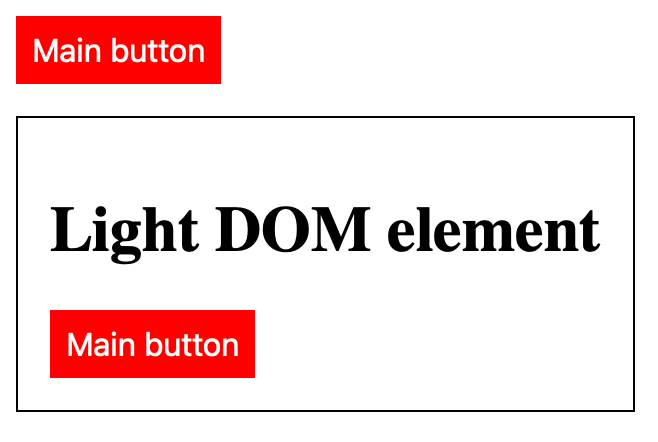
Now let's see what happens when we create a Web Component with only light DOM and a button inside of it:
  constructor() {
    super();

    this.innerHTML = `
      <h1>Light DOM element</h1>
      <button type="button">Main button</button>
    `;
  }
}

customElements.define('light-dom-element', LightDOMElement);
Now the button inside of it has the same CSS applied to it as the button outside of it:
But what if we now want to define different CSS for the button inside of the component?
We can put some styling inside the component with a <style> tag:
class LightDOMElement extends HTMLElement {
  constructor() {
    super();

    this.innerHTML = `
      <style>
        button {
          background-color: #00ff00;
          color: #000000;
        }
      </style>
      <h1>Light DOM element</h1>
      <button type="button">Main button</button>
    `;
  }
}
But that doesn't work because this CSS will now also apply to the button outside of the component:
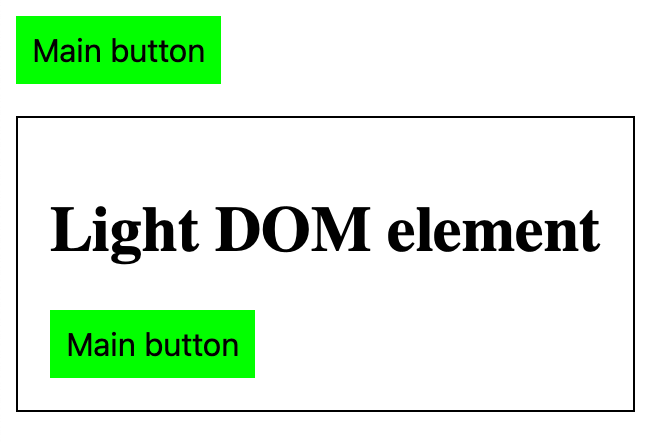
This is where @scope comes in. With a @scope block, you can define CSS that only applies to the component or elements inside of it:
class LightDOMElement extends HTMLElement {
  constructor() {
    super();

    this.innerHTML = `
      <style>
        @scope  {
          button {
            background-color: #00ff00;
            color: #000000;
          }
        }
      </style>
      <h1>Light DOM element</h1>
      <button type="button">Main button</button>
    `;
  }
}
Now only the button inside the component has the scoped CSS applied to it:
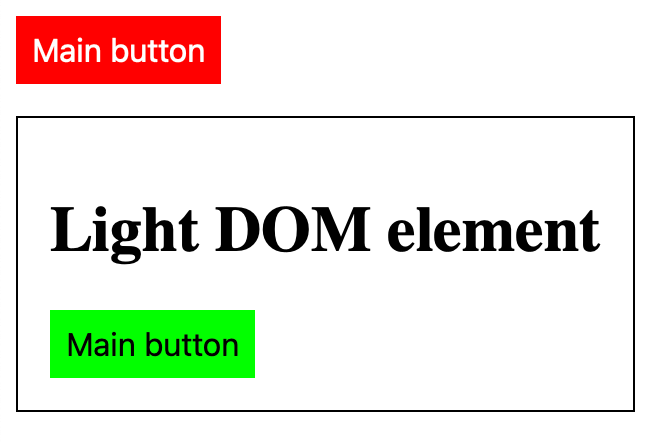
We will also use scoped CSS to apply styles to the component itself. Similar to the way :host is used to apply CSS to a Web Component with Shadow DOM, we can use :scope to do the same for a component with light DOM:
class LightDOMElement extends HTMLElement {
  constructor() {
    super();

    this.innerHTML = `
      <style>
        @scope  {
          :scope {
            display: block;
            margin-top: 1rem;
            border: 1px solid #000000;
            width: fit-content;
            padding: 1rem;
          }
          button.custom {
            background-color: #00ff00;
            color: #000000;
          }
        }
      </style>
      <h1>Light DOM element</h1>
      <button type="button">Main button</button>
      <button type="button" class="custom">Custom button</button>
    `;
  }
}
This example also shows another button inside the component that has scoped CSS applied to it:

Using @scope, you can now use scoped CSS inside a Web Component without using Shadow DOM.
This is in fact how you can apply scoped CSS to any element, using a @scope block and the :scope selector to apply styles to the element containing the block.
Please be aware that, unlike with Shadow DOM, all relevant CSS that is defined outside the Web Component now applies to it, which means you may need more scoped CSS to override styling.
Here's a codepen that shows the differences between a component with Shadow DOM and a component with light DOM (you may need to open the browser version of this email to view it):
Scoped CSS with and without Shadow DOM